How to Use ShadowSocks to Connect to b.VPN Servers on Windows
Notes:
*You need to be a paid b.VPN user to use this feature.
*You need to install “.NET Framework 4.6.2” in order to run Shadowsocks. Go to this link
http://dotnetsocial.cloudapp.net/GetDotnet?tfm=.NETFramework,Version=v4.6.2
and click “Download .NET to get my app working”.
To activate ShadowSocks server, click the link below
https://www.bvpn.com/en/accounts/profile/shadowsocks_server_list/
*Hint: To find out the fastest server according to your current location, use b.VPN desktop application and check the server with least ping response time.
Click “Activate” next to the server of your choice.
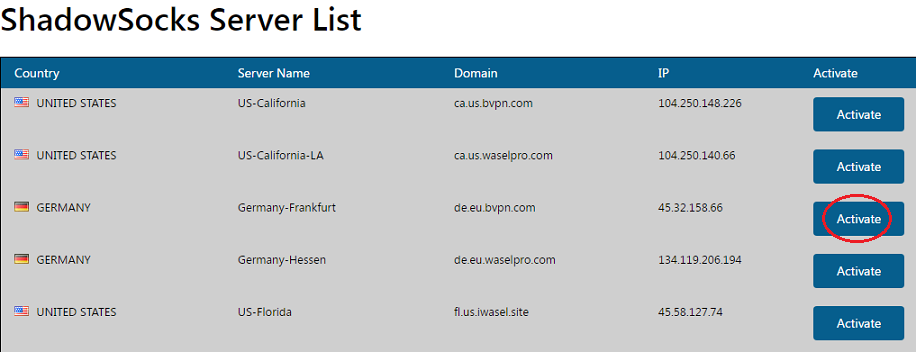
Wait a moment then refresh the webpage you’re on. Now you will be able to see the server’s settings.

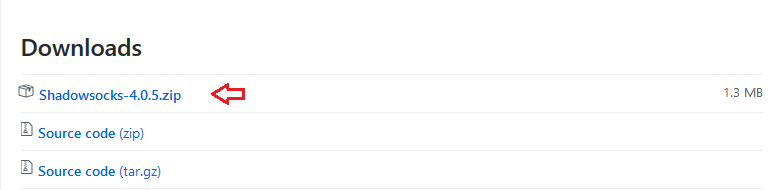
Click the link below to download ShadowSocks on your desktop
https://github.com/shadowsocks/shadowsocks-windows/releases
Under “Downloads”, click “Shadowsocks-4.0.5.zip”. Save the file to your desktop.
Open the .zip file you’ve just downloaded then double click “Shadowsocks.exe” file to open it.
“Edit Servers” window will appear.
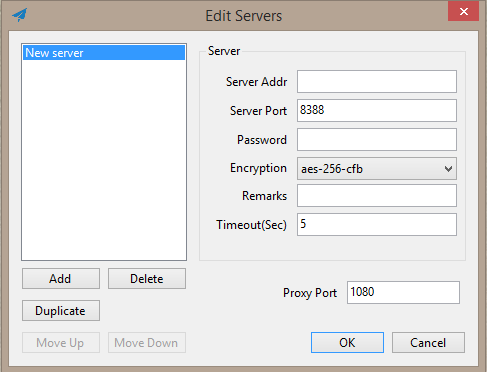
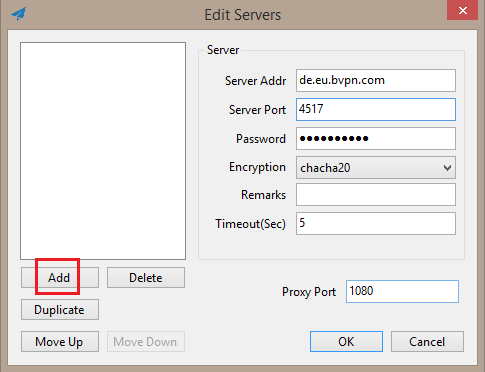
Click “Add” then insert the Server Addr, Server Port and Password. For “Encryption”, select “chacha20”. Click “OK”.
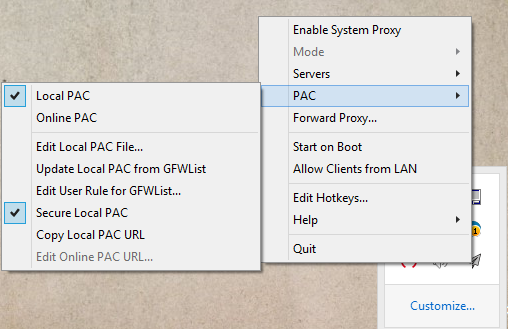
In the task bar, right click Shadowsocks icon. For “PAC”, check “Local PAC” and “Secure Local PAC”.
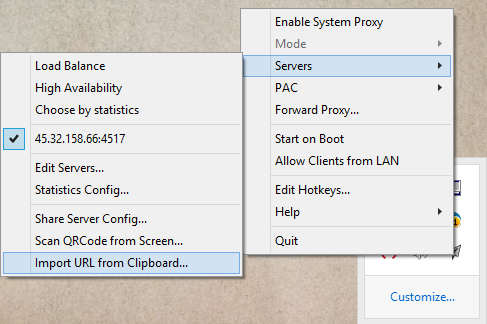
From “Servers”, click “Import URL from clipboard”.
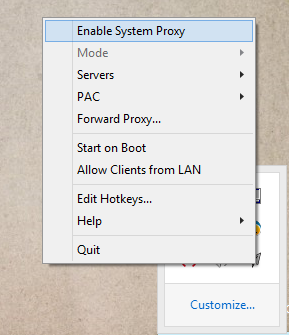
"Enable System Proxy".
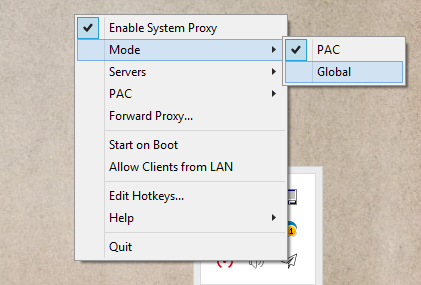
Then click "Mode" and set to "Global".
*You need to adjust proxy settings in your browser to allow it to connect to the open client.
If you’re using Google Chrome:
Go to “Settings” > “Advanced” > Under “System” click “Open proxy settings” > “LAN settings” > Check “Use a proxy server for your LAN” > "OK"
If you’re using Mozilla Firefox:
Press ALT+T > “Options” > “Advanced” > “Network” > “Settings” > Check “Manual proxy configuration” then “Use this proxy server for all protocols”
*Note:
In case you lose internet connection after Shadowsocks connects, you will need to deactivate/ reactivate your session. In order to do so, please visit the link below:
https://www.bvpn.com/en/accounts/profile/shadowsocks_server_list/
and click/ tap “Deactivate” button next to/ below the Server Name.